How should you prepare for and carry out the installation of insulated panels?
Sandwich panels
Good installation of insulated panels requires preparation before the material even arrives. The layout of elements must be agreed, the structure checked, unloading arranged and accessories assembled. During work, the most important things are correct support, tight joints and compliant fastenings. At the end, details need to be signed off and surfaces tidied. Speed of laying should not replace checking these stages. The contractor should receive the cladding design, panel layout and the instructions for the specific system. It is worth agreeing details for corners, plinths, windows and roof connections before installation begins. The required fire classifications and the conditions for maintaining them must also be specified. Different panels may look similar but have different rules for making joints.
How do you prepare the scope of work and documents?
The contractor should receive the enclosure design, panel layout and the instructions for the specific system. It is worth establishing the details of corners, plinths, windows and roof connections before installation begins. The required fire classifications and the conditions for maintaining them must also be specified. Different panels may look similar but have different rules for forming the joints.
Divide responsibility for the structure, unloading, fixings and flashings. Establish the delivery sequence and the storage location. If several crews are carrying out the work, coordination of service openings is important. Later, accidental cutting of the finished enclosure can damage its airtightness and alter the behaviour of the panel. A well-prepared schedule also limits the moving of packs and the risk of damage.
What should you check in the structure and delivery?
Before covering, check the geometry, spacing and widths of the supports. Confirm that the actual substrate matches the choice of fasteners. The anti-corrosion protection should be complete and sharp elements removed. Panels must not be used to level an uneven frame. Any significant deviation must be clarified before work begins.
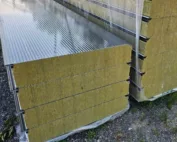
On receipt of the material, compare the labels, number of pieces, lengths and finish with the order. Inspect the facings and the locks. Document any damage before moving further. Place the panels on suitable supports, protected from water and without trapping moisture in the pack. Keep the markings legible so that elements of similar dimensions are not confused during installation.
How should lifting and the first fastening be organised?
Select equipment to suit the length, weight and type of facing. Lifting a mineral wool panel may require different organisation than a lighter PIR element. The clamps and their arrangement should correspond to the instructions. Do not pull on the thin sheet alone or slide elements over one another in a way that scratches the coatings. Before work, assess the weather conditions and access to the installation zone.
The first panel sets the direction for the following ones. Check plumb, level or position relative to the eaves depending on the application. Confirm the correct side of the element and the orientation of the lock. Place the required tapes on the supports. Correcting the position early is simpler than trying to level an error after several more pieces have been fixed. A straight line of joints results from measurement, not from pressing the panels together alone.

How do you keep the joints tight?
The lock should be brought together in accordance with the instructions, without damaging the edges and seals. Use the correct materials in the places specified by the system. The factory seal, the tape on the support and the sealant at the flashing have different functions. They are not replaced arbitrarily by a single universal product. The details also depend on the humidity and the function of the building.
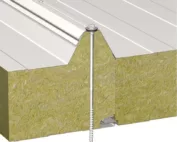
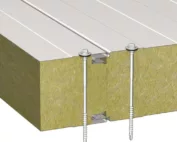
Fasteners must be suitable for the panel and the substrate. Check the position and embedment depth. Excessive pressure can distort the facing or the seal, while too little leaves a gap. For concealed fixing, check the connection before it is covered. Remove drilling and cutting swarf as you go. Swarf left on the paint can lead to corrosion marks.
When should cutting and flashings be carried out?
Cut-outs should follow from the layout and the agreed details. Use tools approved for the panels, without overheating the edges. The cut-off piece must be supported, and the exposed core protected with the required finish. Large openings may require additional framing. They should not be made on the basis of the unit diameter alone, without checking the position in the panel.
Install flashings so that they ensure water drainage and the intended tightness. This applies in particular to the base, corners, eaves and service penetrations. Do not leave open edges exposed during rain. Protective film should be removed in accordance with the instructions for the given product. Leaving it in the sun for too long can make it difficult to remove and impair the appearance of the surface.
How should the completed enclosure be inspected and handed over?
Check that the layout matches the design, along with the fixings, locks and flashings. Inspect the facings from both sides. Pay attention to repair points, new openings and elements added during the work. Surfaces should be clean and drains clear. If in doubt, establish the cause of any unevenness or leakage rather than masking it with another layer of material.
Hand over the documents, cleaning instructions and maintenance rules to the user. Keep the fastener markings and photographs of covered details. Establish how future service penetrations are to be made and additional equipment fixed. Acceptance does not end with the statement that the walls are closed. It should confirm that the enclosure is complete, consistent with the adopted solution and prepared for proper use.
7 branches. Materials closer to your project.