Installing insulated roof panels: supports, joints and flashings
Sandwich panels
Installation of insulated roof panels begins with checking the structure, the pitch and the layout of the elements. Safe lifting, correct connections and the selection of fasteners then matter. A weathertight roof is created by compatible details at the eaves, ridge and service penetrations. There is no single installation scheme for all panels. The installer should use the instructions for the specific system and the roof design. Check the spacing and widths of the purlins, the bearing surface and the actual roof pitch. The structure should correspond to the design and the load tables for the selected panel. Snow, wind and temperature effects are important. It must not be assumed that any roof profile fits the existing support spacing.
What must be checked before delivery?
Check the purlin spacing and widths, the bearing surface and the actual roof pitch. The structure should match the design and the data sheets for the selected panel. Snow, wind and temperature effects matter. Do not assume that any roof profile will suit the existing support spacing.
Decide whether the panels will run from eaves to ridge in one length or be joined along their length. Check rooflights and larger penetrations. In one set of instructions the required pitch is over 5% without transverse joints and rooflights, and over 7% where these occur. Other systems have different requirements. This is an example of a dependency, not universal values for every roof.
How should unloading and lifting be prepared?
Establish the weight and length of the largest component. Select the hoist, spreader beam or vacuum device to suit the panel and its coating. Sufficient lifting capacity alone does not guarantee correct support of a long panel. Incorrect gripping can distort the sheet or damage the bond. Transport to the roof must be planned before work begins.
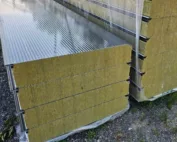
Prepare a safe area for unloading and setting down. Do not stack packs on the structure without confirming the permissible load. Remove the film at the locations and times specified in the instructions, especially before using certain grippers. Work is carried out in weather conditions permitted for installation. A large panel is susceptible to wind, so the weather affects how the whole task is organised.
What determines the correct laying of the first panel?
The first component sets the line for the following ones. Its position relative to the eaves and the structure must be checked, as well as the side and direction of the overlap. Panels have a defined geometry of locks and profiles. They must not be turned arbitrarily to simplify lifting. An error at the start can grow across the entire roof width.
Before fixing, check the required tapes on the supports and the condition of the seals in the lock. The next component must be pushed home as the system intends. Do not leave a gap in reliance on later covering it with sealant. While laying, monitor the line and module. Small deviations are easier to correct early, before the next panels are fixed.

How are fastenings and connections carried out?
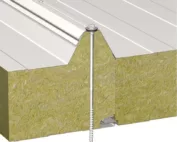
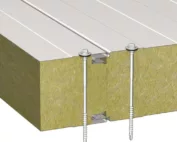
Fasteners are selected to suit the panel and the support. The number, position and method of setting are determined by the design and the instructions. Additional components distributing the pressure may be present on the roof. Screws joining the sheets at the overlap do not replace fixing the panel to the structure. These are different connections with different functions.
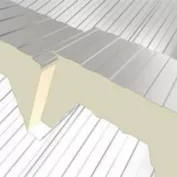
Where a transverse joint occurs, the required overlap, support and sealing must be maintained. The overlap length depends on the system and roof conditions. A single value should not be assumed for all panels. Also check the core rebate and the direction of water drainage. Reversing the layer sequence at such a point can cause a leak, even when the visible part of the joint looks even.
How should the eaves, ridge and penetrations be finished?
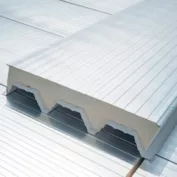
Flashings should match the profile and thickness of the panel. At the eaves, water drainage and protection of the core edge must be ensured. At the ridge, continuity of insulation and proper closing of the joint are important. Profiled seals, tapes and sealants are selected according to the function of the detail. Not every material is suitable for all these locations.
Large service penetrations and skylights require the specified support. Openings should not be cut without checking their position relative to supports and seams. Cutting is carried out by a method that does not cause harmful heating of the facings. Swarf must be removed without delay. Particular attention should be paid to locations where water may accumulate at the flashing instead of draining freely.
What does the handover of a completed roof cover?
Check the position of the panels, joints, fasteners, flashings and drainage. Verify that the core is not left exposed and that the surface is free from swarf and damage. Confirm that the film has been removed in accordance with the instructions. Keep photographs of important details and documents for the materials used. This facilitates subsequent inspections and any service work.
Establish rules for movement on the roof and access to equipment. The roof panel is not an unrestricted working surface for storing equipment. Point loads and service routes should be taken into account in the design. After installation, it is worth inspecting the roof during rainfall as well. Proper acceptance combines assessment of documents, visible details and actual water drainage.
7 branches. Materials closer to your project.