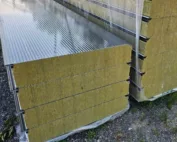
Sandwich panel flashings and details: preparing a complete package
Sandwich panels
Sandwich panel cladding requires agreement on places where panels end, change direction or meet other building components. At these locations, a panel list alone no longer describes the complete order. Flashings, fixings and sealing materials need to be linked to the relevant details rather than selected solely by colour. This guide creates a map of those interfaces, gives them identifiers and moves from drawings to an accessory schedule. It also examines responsibility at windows, doors and service penetrations. It does not prescribe a universal flashing shape or sealing method: the solution must suit the particular panel, the enclosure’s function and the project documentation.
In this guide
Map every interface
An accessory schedule is clear when each item has an identified application. “Corner flashing” alone does not distinguish an external façade corner, an internal wall junction or an edge beside an opening.
Follow the perimeter of every elevation and roof slope on the drawing. Identify the base, corners, ends, openings and transitions to other materials. Assign a separate code to each distinct solution. A repeated detail can share an identifier, provided its occurrences can be counted without guessing which sections it covers.
Separate the visible flashing from the other layers
Record the drawing reference and the panel involved beside each code. Where a detail comes from system documentation, check that it matches the selected variant and site situation. A drawing for a similar panel is not automatically a suitable solution. Flag uncertainty before preparing fabrication dimensions for flashings.
Distinguish the outer cover from seals, infill and fixings in each detail. The visible metal does not describe every component of the connection. The purchase schedule should follow the complete arrangement, including materials that will be concealed. Avoid replacing an absent specification with “seal as necessary”.
Coordinate interfaces with windows and equipment
At a window or large door, agree where the cladding scope ends and the opening supplier’s scope begins. Record responsibility for dimensions, the supporting substrate, flashings and closing the junction. If each party assumes another will supply the missing item, the panels can arrive without everything needed to finish the opening.
Include service penetrations in the detail map even if equipment will be fitted later. Record known positions and mark information still awaited. A hole on a plan does not define support, sealing or the completed penetration’s required performance. Coordinate those matters with the people responsible for the relevant design disciplines.
Define shape and finished face
Describe a flashing with a dimensioned section and an indication of its visible face. Mark orientation for asymmetrical shapes to avoid a mirrored part. Also agree material and coating. A colour code does not replace these details, and a photograph of a similar trim is not an unambiguous fabrication drawing.
Relate lengths and segment divisions to the agreed flashing-joint arrangement. A building edge length need not equal the sum of lengths ordered. However, do not add an arbitrary allowance without reference to the detail. The schedule should state piece counts, lengths and the basis for the quantities adopted.
Link accessories to detail identifiers
Assign fasteners to the connection and substrate specified in the design. Leave fields for the exact identifier and confirmed quantity. Do not transfer a fixing solution from another building merely because its panels have the same thickness. If selection is unresolved, show that explicitly instead of ordering an arbitrary set.
Check which components are needed before panels are positioned and which follow their fixing. Record the agreed sequence for partial deliveries. This concerns material availability at each stage, not a universal installation method. A missing small component that will later be concealed can affect the programme even when all panels are present.
Check completeness before delivery
Before confirming the package, revisit every detail code. Identify its supplier, approved drawing and material items. A code without an assigned supply remains unresolved. Conversely, an item without an application needs checking so that accidental duplication does not inflate the order.
A change in panel type, thickness or opening geometry should trigger a review of related details. Update drawing and schedule together and mark the earlier revision as superseded. Keep confirmation of which parts remain suitable and which need alteration. This avoids retaining accessory orders based on a solution that has already been abandoned.
7 branches. Materials closer to your project.